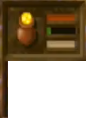
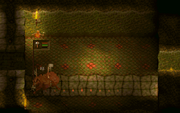
A flag for a Treasure Room
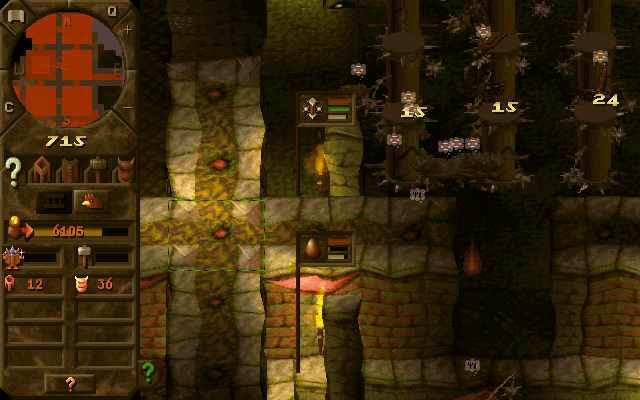
The Room Flags for a Training Room and Hatchery
In Dungeon Keeper, Room flags represent the status and type of room after it's constructed, and will update accordingly to fit every change the room receives from the player. When a new room is built, a flag appears on the first tile that was laid down. The flag has a picture icon on it telling you what type of rooms it is.
Next to the icon are three bars, in order, from top to bottom, representing the following:
- Health
- Capacity
- Efficiency
Health[]
The health of a room will begin and remain full until a rival Keeper's Imps try to claim it. There is a large time before the room's health starts to decrease, this time increases the larger the room is, meaning it is easier to defend larger rooms from capture. Once the room has been drained of health, the room belongs to the enemy Keeper and its health will return to full.
Calculation[]
The health for a room is simply proportional to the number of slabs in that room (2*no. slabs).
Capacity[]
The capacity of a room depends on how many creatures or objects occupying it. If nothing is occupying the room, the bar will be empty, and will increase for each creature and object occupying it until it is full and can contain no more. If the bar is high, then the room is nearly full, and you should consider expanding it or (if possible) increasing its efficiency (see below).
Examples of objects that use up capacity are:
- Gold for the Treasure Room
- Chickens for the Hatchery
- Spell books and creatures for the Library
- Trap crates and creatures for the Workshop
- Corpses in the Graveyard
Efficiency[]
| "You can build a room any size and shape you want, but that room might not be as efficient. Efficiency directly affects the rate at which a room works. A more efficient Hatchery, for example, produces more chickens, a more efficient Library researches faster. A totally inefficient room is a single tile on its own. It is, in fact, negatively efficient.
If a room tile has another room tile of the same type placed next to it, its efficiency automatically increases. The more room tiles of the same type surround it, the more efficient it becomes. The most efficient room tile is one that is completely surrounded by room tiles. In general, large, square, enclosed rooms are the most efficient. Sometimes it’s impossible to build rooms in the shape you want—the Efficiency rating helps you make the best of the area you’ve got. Efficiency also affects the fire trail which travels around the perimeter of the room. The higher the flame, the more efficient the room." |
| — Dungeon Keeper Manual |
The efficiency of a room means how much it can hold for its size. Efficiency depends on the number of surrounding room tiles and walls. The least efficient design is a single tile not surrounded by walls or room tiles of the same type. The most efficient rooms are rooms filled with only one type of room tile and fortified walls and doors. As can be seen from the above image, the Training Room is very efficient (but not totally, as there are many doorways leading out of it), and the Hatchery is less efficient because (as seen on the minimap) it is surrounded by some floor tiles.
Calculation[]
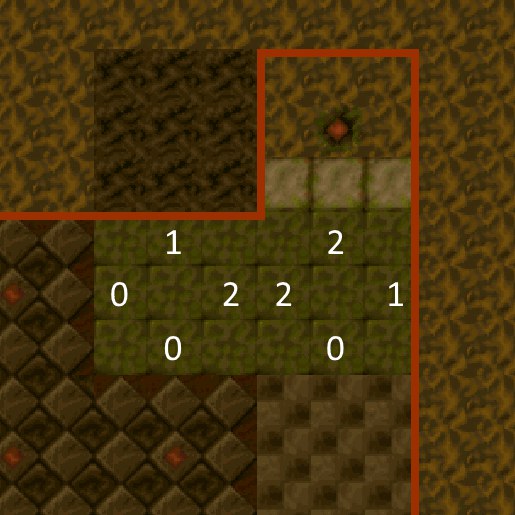
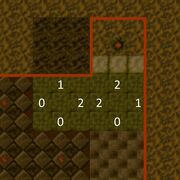
The efficiency calculation of a room.
Efficiency is calculated by the following formula: Each slab is first given an efficiency score from 0 to 8, comprised of the sum of the four slabs orthogonally adjacent to it. Slabs of the same room, your reinforced walls and doors are worth 2 points, other "neutral" walls are worth 1 and any other floors or liquids (or fortified walls and doors that aren't yours) are worth 0. Center slabs of a room (that is, a slab surrounded by 8 slabs of the same room and owner) get 2 bonus points for a total of 10 points. A room's total efficiency score is the sum of the efficiency scores of its slabs, and the room's efficiency is displayed as a fraction of the room's total possible efficiency. It is possible in this way to have a room with 0% efficiency.
Mathematically, this can be expressed as the following: for a room and each slab in , the efficiency score of R, is given by


and


where and are the efficiency values for the tile to the north, east, south and west of the slab in question respectively (given in the table below), and .


Efficiency Values[]
The below table gives the efficiency value for each slab. The general rule of thumb is that high slabs (walls, gold etc) are worth 1 and low slabs (floors, liquids) are worth 0.
| Icon | Slab | Efficiency |
|---|---|---|
| Dirt Path | 0 | |
| Claimed Path | 0 | |
| Gold Seam | 1 | |
| Gem Seam | 1 | |
| Earth | 1 | |
| Reinforced Wall (yours) | 2 | |
| Reinforced Wall (other) | 0[Notes 1] | |
| Impenetrable Rock | 1 | |
| Doors (yours) | 2 | |
| Doors (other) | 0 | |
| Rooms (same, yours) | 2 | |
| Rooms (other) | 0 | |
| Lava | 0 | |
| Water | 0 | |
| Slab50 | 0 | |
| Purple Path | 0 |
Widespread Factor[]
Efficiency is also affected by how "square" a room is, with rooms taking an efficiency penalty if their height and width differ by too much.
This is calculated by comparing the room score with an "expected" number of central slabs, taken from a table. The total number of slabs is taken and is used to look at the th element of the table, , (returning the maximum score of 25 if is greated than 50).


For a room , the widespread factor, is given by the following:


where is the number of slabs in the room and is the th element of the table. This is then compared to the expected base , given by


Then, the final efficiency is given by

For example, a room made of 25 slabs completely surrounded by reinforced walls and doors (seemingly max efficiecy) can have a different final efficiency depending on its dimensions (or rather, how many centre squares it has):
If this room was a 5x5 room,

so the final efficiency is 256 (100%). However, if it were a 25x1 room,

and so the final efficiency is
or 85%.

Examples of how efficiency changes capacity:
- Treasure Rooms can store more gold (less efficient rooms can only store small bags of gold, while more efficient rooms can store larger piles of gold, and even gems and treasures, meaning more gold collected on each tile).
- Libraries will research quicker and allow for more researchers and stored spells and Dungeon Specials.
- Training Rooms will allow more units to train and will train them faster. The price of training will not increase, so training a unit to level 10 in an efficient Training Room is both faster and cheaper.

An example of a minimally efficient Workshop
Examples of minimum efficiency include:
- Treasure Rooms can only hold the minimum quantity of gold (a pile of gold).
- Workshops do not construct anything, i.e. the Manufacturing Bar does not increase.
- Lairs can only support one creature.
Notes[]
- ↑ This is 1 in Dungeon Keeper FX to match other high blocks, as of Alpha 0.5.0.3339
| ||||||||